How to use Liminal
Everything in Liminal, from installing it to the last button. Liminal is built to be used by hand: pick a style, pull the threshold down until it sounds right, and the ceiling keeps the peaks safe. When you want a second opinion, the Tools button has Learn, Optimise, Mix Doctor and the rest. Hover over any control in the plug-in for a short explanation too.
1. Install
Windows
- Run the installer. It copies
Liminal.vst3toC:\Program Files\Common Files\VST3, the standard folder every VST3 host looks in. If you have a zip instead, copyLiminal.vst3into that folder yourself. - Open your DAW and let it rescan plug-ins (most do this on start-up; in some you need to press Rescan in the plug-in settings).
- Find Liminal under the maker MasterScope, in the Dynamics or Effects category.
On Windows, Liminal needs Windows 10 or 11, 64-bit, and a DAW that loads VST3 plug-ins: Ableton Live, FL Studio, Cubase, Reaper, Studio One, Bitwig and most others.
macOS
- Open
Liminal-1.1.0-macOS.pkg. Liminal isn't notarised by Apple yet, so the first time macOS may say it can't check the installer: open System Settings → Privacy & Security, scroll down, click Open Anyway, then open the installer again. - It installs
Liminal.vst3to/Library/Audio/Plug-Ins/VST3andLiminal.component(the Audio Unit) to/Library/Audio/Plug-Ins/Components. Untick either under Customise if you only want one. - Open your DAW. Logic and GarageBand check new Audio Units when they start; in other hosts, rescan plug-ins. Find Liminal under MasterScope.
Liminal runs natively on Apple silicon and Intel Macs with macOS 10.13 or later, in any VST3 or AU host: Logic Pro, Ableton Live, FL Studio, Cubase, Reaper, Studio One, Bitwig and others. Measuring "this computer's sound" is Windows-only; on a Mac, measure through the track's input.
Uninstall
Delete Liminal.vst3 from the VST3 folder (on a Mac, also Liminal.component from /Library/Audio/Plug-Ins/Components). Your own presets are kept in Documents\MasterScope\Liminal\Presets (on a Mac, ~/Documents/MasterScope/Liminal/Presets), so reinstalling brings them back. Delete that folder too if you want them gone.
2. Quick start
- Put Liminal last on your master bus, after any EQ, compression or saturation. Nothing that changes the level should come after it.
- Pick a style. Lookahead (the default) suits most music. Or start from a preset such as Streaming: punchy (PLR 10).
- Play the loudest part of the song and pull the Threshold down until it's as loud as you want and still sounds right. Auto makeup turns the output up as you go, and the Ceiling (−1.0 dBTP) keeps the peaks safe.
- Watch the Loudness card. It shows the integrated loudness, the true peak and the PLR (density). For streaming, a PLR of 9 to 11 is punchy and competitive.
- Listen honestly. Turn on Level match to hear your unlimited mix at the same loudness, and Hear what's removed to hear only what the limiter takes away. If the drums lose their snap, back the threshold off or try Punch Guard.
- Want a second opinion? Open Tools, choose a target and press Learn, play the song, then press Stop: Liminal suggests the threshold that lands on it. See Learn and targets.
- Bounce your master as usual. Optional: press Report (beside Learn) or use the Session log, and choose Open in MasterScope to check it against every platform in your browser.
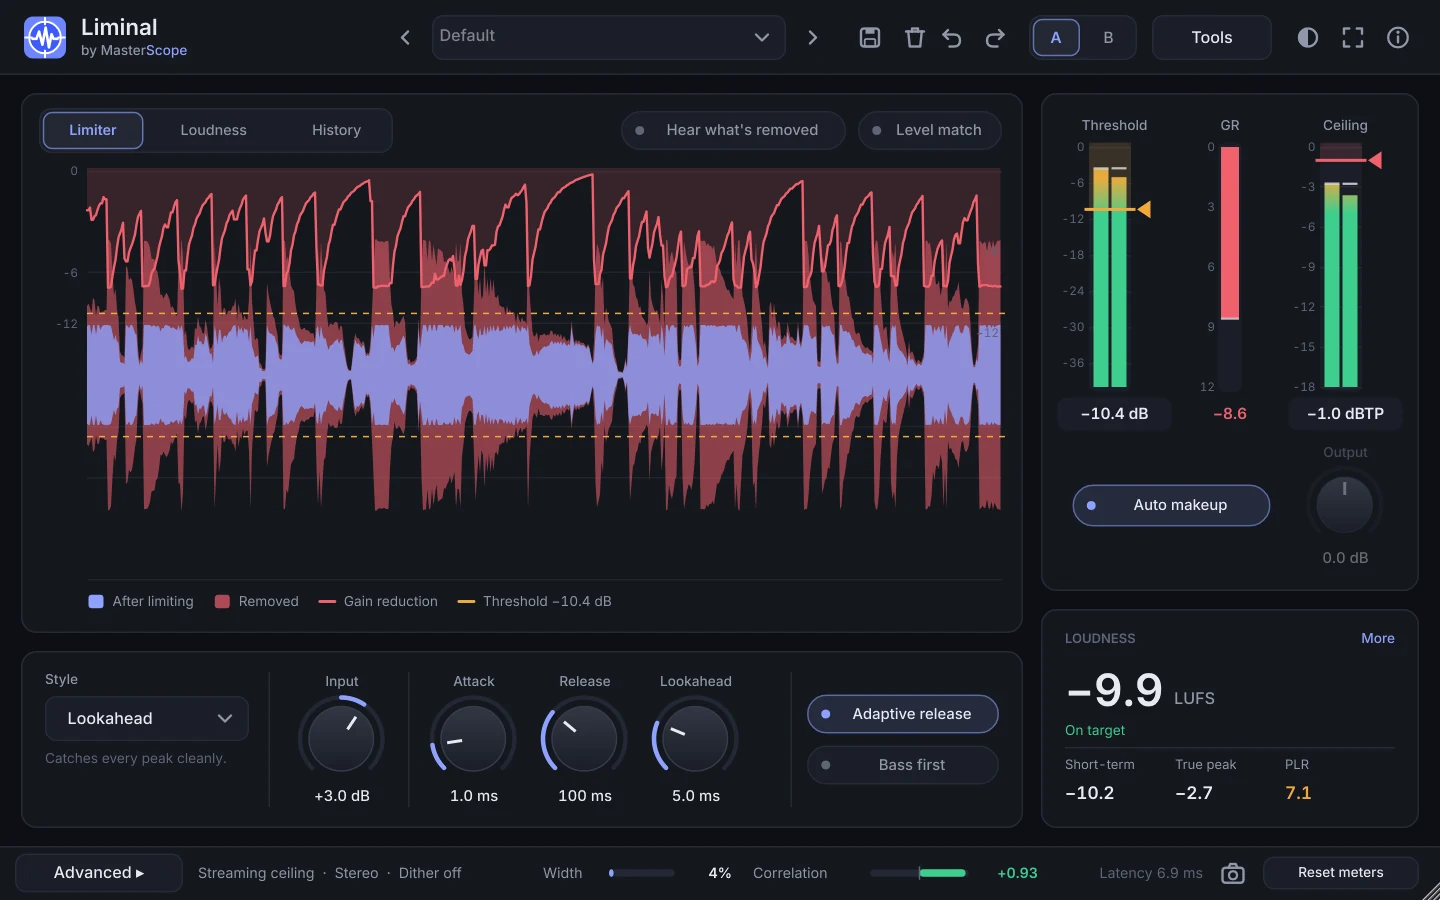
3. The window
- Top bar: presets (arrows step through them), Save, Delete, Undo, Redo, A/B, Tools, dark or light theme, full screen and About (ⓘ), which has links to this guide and What's new.
- Display (top left): Limiter, Loudness and History tabs, plus a tab for whichever tool you opened. Above it on the right: Hear what's removed and Level match. See Views and Tools.
- Controls (under the display): the Style menu with a one-line description, the knobs for that style, and Adaptive release and Bass first.
- Meters (right): Threshold, the GR meter and Ceiling, then Auto makeup and Output.
- Loudness card (bottom right): integrated loudness, distance to your target, short-term, true peak and PLR. More opens every reading.
- Bottom bar: Advanced with a summary of its settings, the stereo correlation meter, latency and Reset meters.
- Advanced opens a strip with the settings you set once and leave: Oversampling, Linear phase and 4x on export, the ceiling mode, M/S and Sidechain, Stereo link and Dither.
- Tools opens a panel with Learn at the top, then Optimise, Mix Doctor, Spectrum, Spectrogram, Measure a song, Reference track, Codec check and Session log. Nothing in Tools changes your sound until you say so.
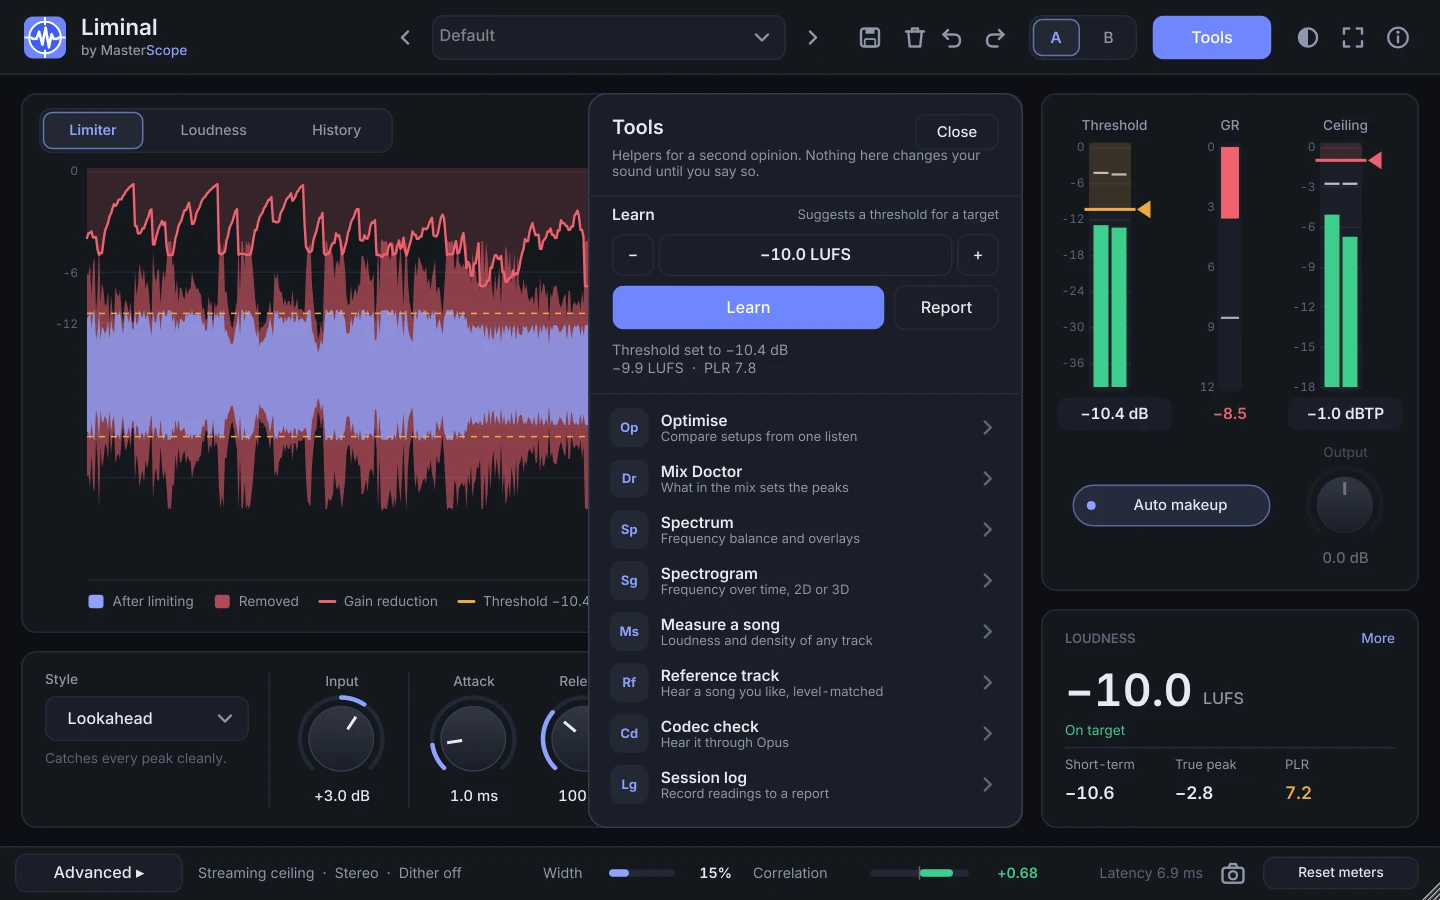
Drag the bottom-right corner to make the window any size (the display gets the extra room), or press full screen. New instances open at the size you last used.
4. Learn and targets
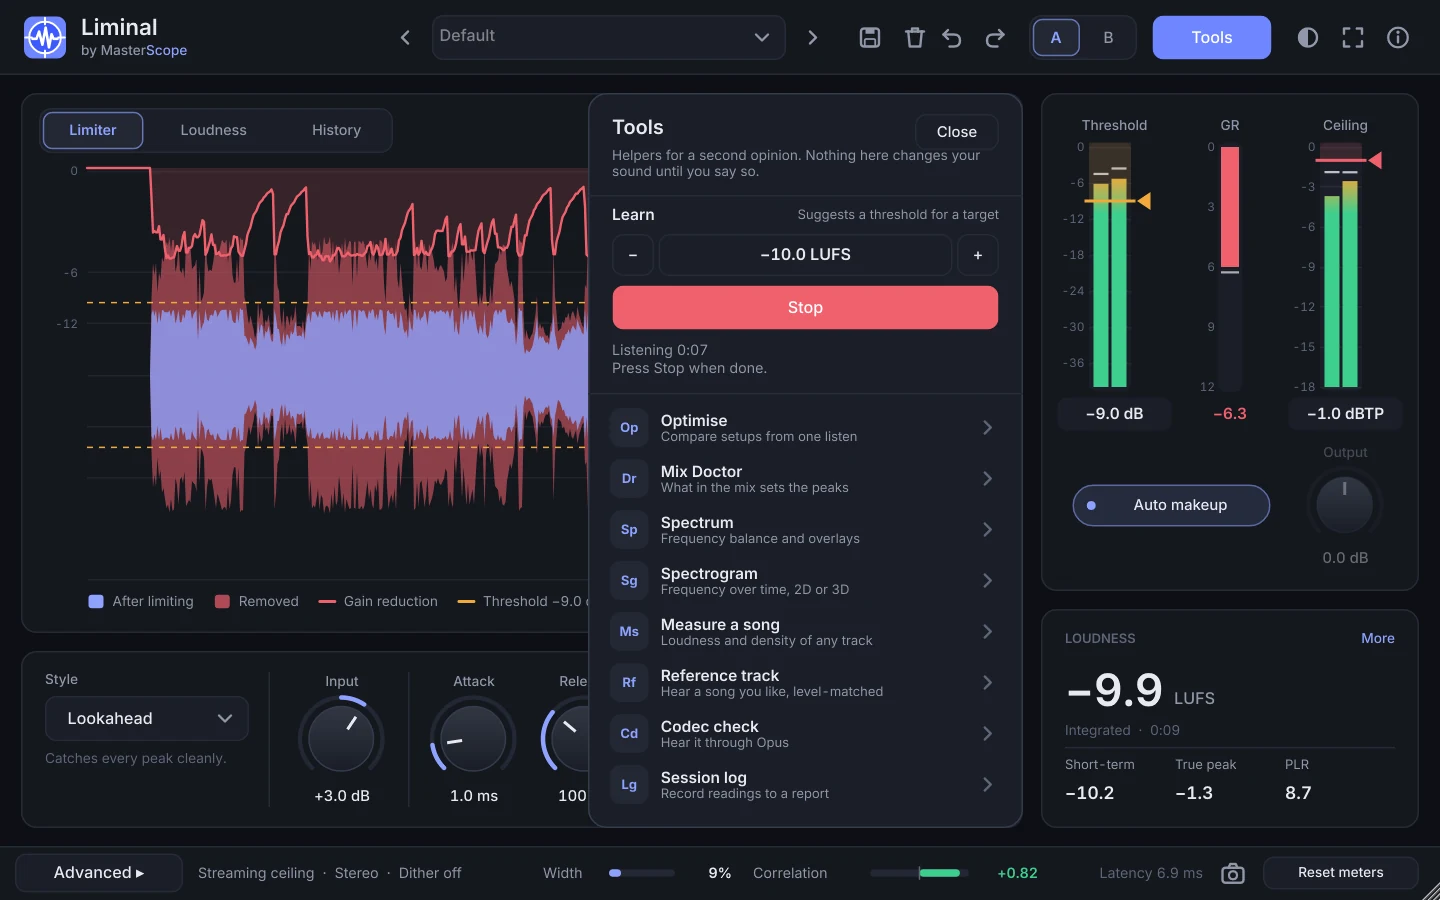
Learn suggests a threshold for a target. It's at the top of the Tools panel: choose the target, press Learn, play the song, press Stop. While you play, it listens; when you stop, it renders what it heard through hidden copies of itself at different thresholds, picks the one that hits your target at your ceiling, and checks the result through real streaming encoders. Then it restarts the loudness readings so they reflect the new setting. Undo puts the old threshold back.
Two kinds of target
| Target | What Learn aims for | Use it when |
|---|---|---|
| Loudness (LUFS) | An integrated loudness: −14 for Spotify, YouTube, Tidal and Amazon; −16 for Apple Music; around −9 for club. | A distributor, label or client asks for a number. |
| Density (PLR) | A peak-to-loudness ratio: how dense the master is. 9 to 11 is punchy and competitive; 12 and up is open; under 8 sounds squashed. | Streaming. The services turn every song to the same loudness, so density is what listeners actually hear. |
While Learn calculates, a bar under the button shows its progress. Afterwards the Loudness panel shows what Learn measured (Learned: −14.0 LUFS) until enough of the song has played again for its own readings to settle; the line under the big number says how long it has been measuring.
Use the − and + buttons for small steps, or click the value for the full list. Learn's own report (the Report button) is the same file the Session log makes, rendered from what Learn heard, so one listen gives you the setting and the report. More on why density matters in Learn: density.
5. Ceiling and codecs
The Ceiling is the highest true peak the output can reach. −1.0 dBTP is the usual target for streaming; use −2.0 for very loud masters. In Advanced, the ceiling mode decides what the ceiling protects against:
- True peak: the classic ceiling. The file's own peaks, including those between samples, stay under it.
- Streaming (the default): also keeps the peaks a listener gets after Opus (YouTube) and Ogg Vorbis (Spotify) encoding under the ceiling. Encoders remove the very top of the spectrum and that pushes peaks up; Learn measures how much for your song with the real encoders and allows for it. No extra latency.
- All codecs: adds a 1 dB margin for MP3 and AAC (SoundCloud, DJ downloads, Apple Music), whose encoders overshoot a little more.
That's why, after Learn in Streaming mode, the true peak can sit well under the ceiling while the Codec peak (under More on the Loudness card) sits right at it. More in Learn: peaks.
6. Styles
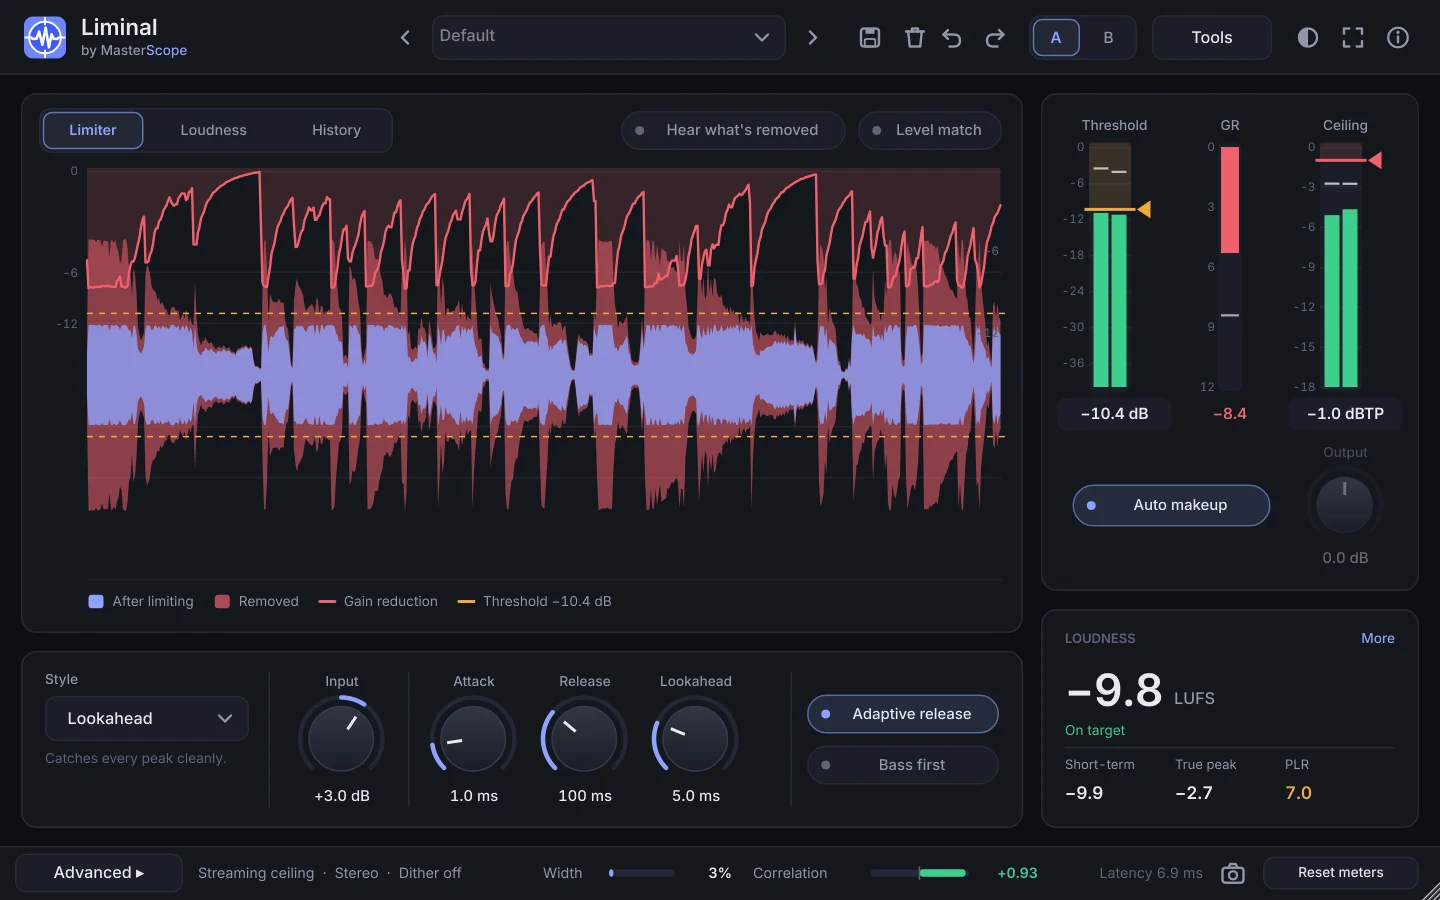
Choose a style from the Style menu under the display. Each shows only the knobs it uses.
| Style | How it works | Best for |
|---|---|---|
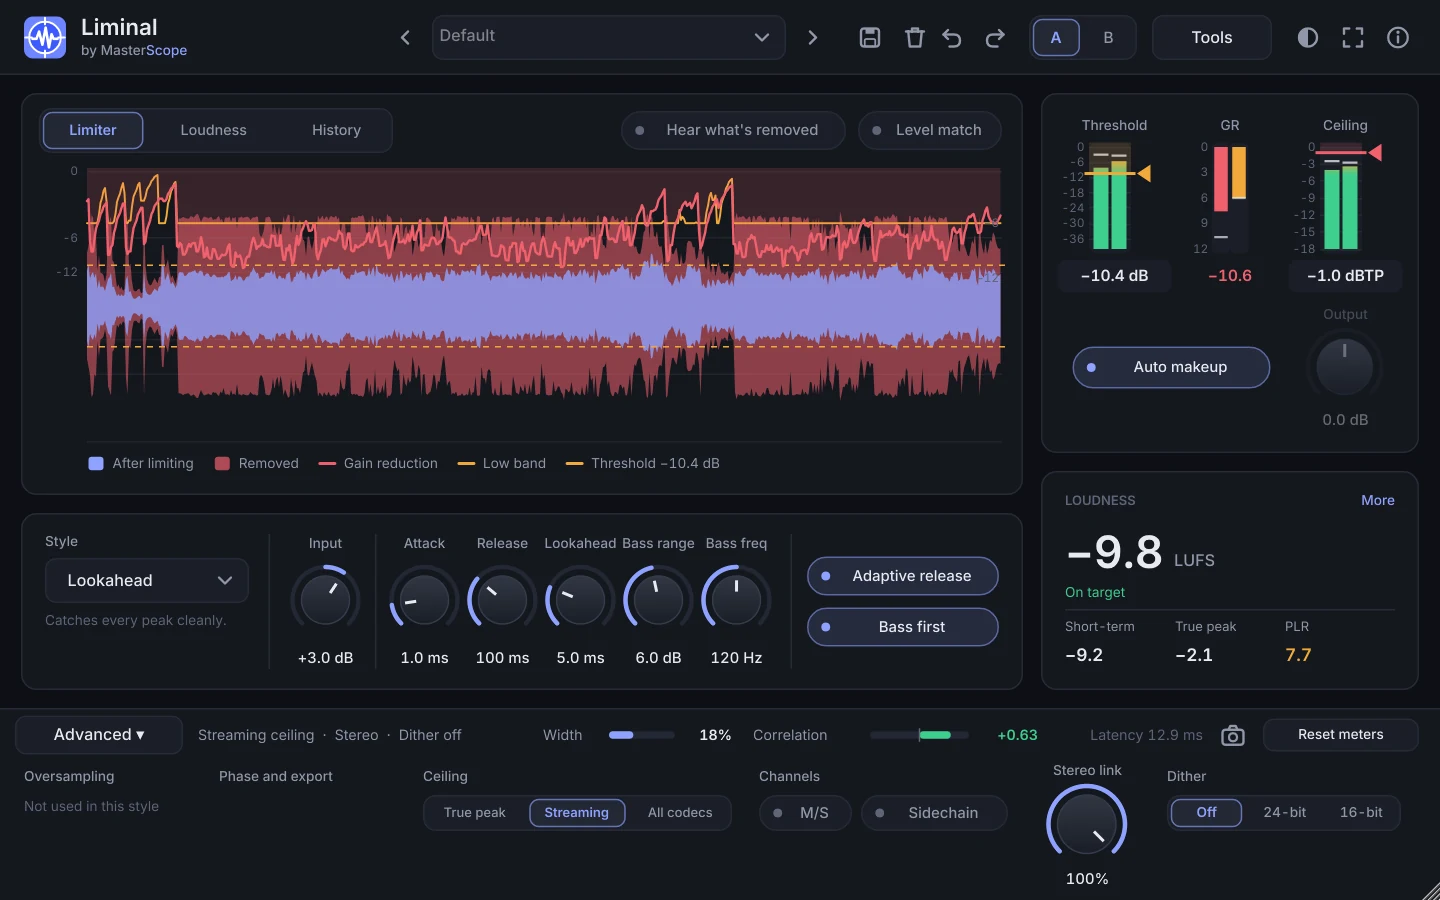
| Lookahead | Sees peaks coming and turns down smoothly before they arrive. | Most mastering. The cleanest mode, and where Bass first works best. |
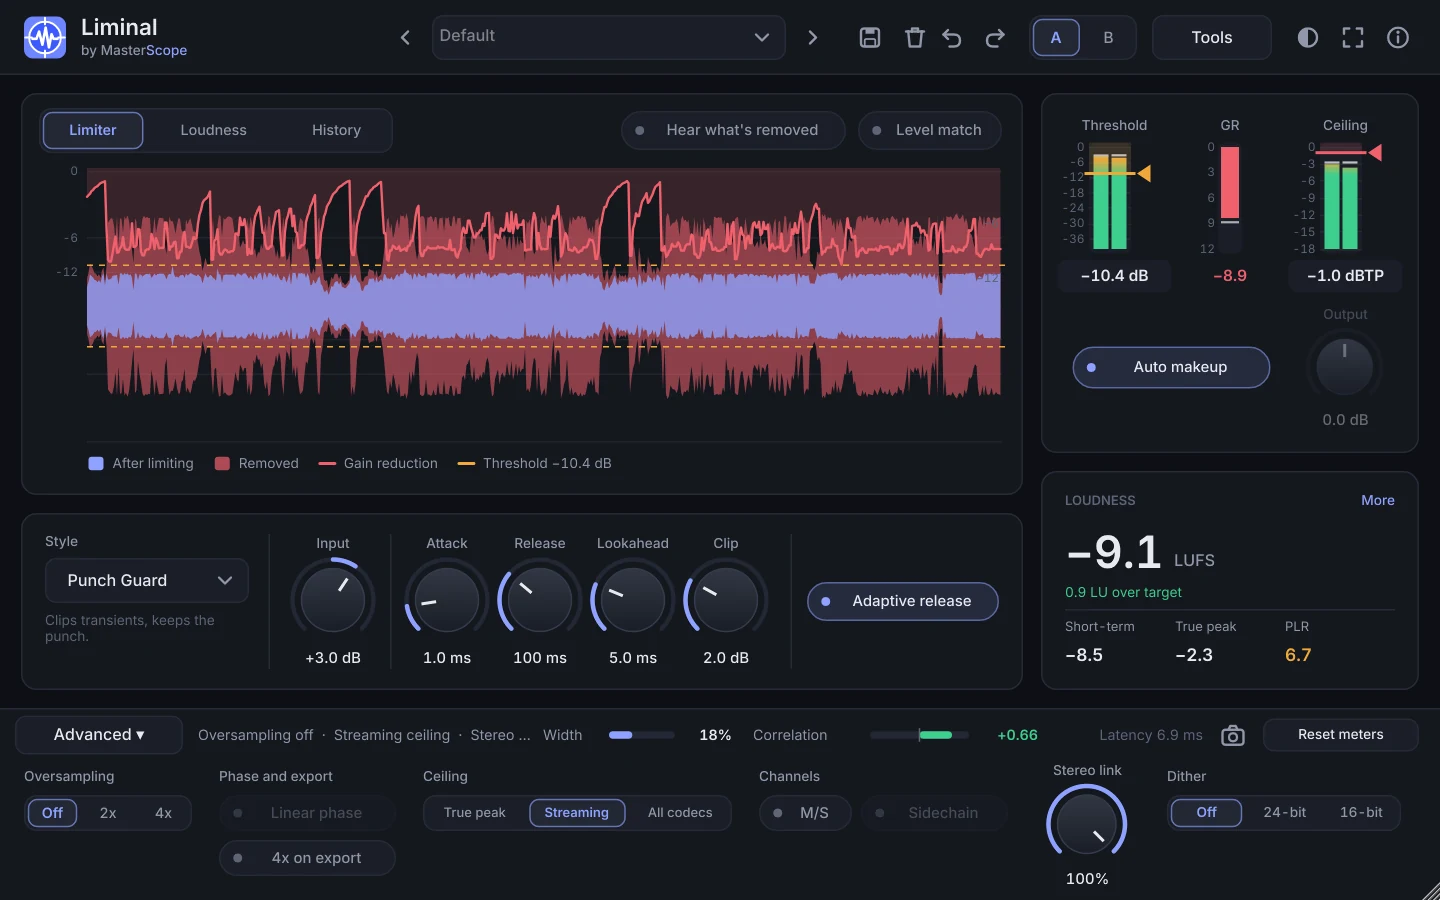
| Punch Guard | A lookahead limiter into a clipper: the tips of the hits go to the clipper, so the mix isn't turned down around every drum hit. | Dense, drum-led music where you want loudness and snap. Use 2x or 4x oversampling. |
| Multiband | Lows and highs are limited separately, split at the Crossover, then a final stage holds the sum. | Mixes where a big kick or bass makes everything else duck. |
| Brickwall | Instant, zero-latency limiting. | Tracking and live monitoring, or deliberately hard limiting with oversampling. |
| Soft Clip | Rounds peaks off for a warmer, driven sound. Drive sets how hard. | Character and saturation, or before another limiter. |
7. Every control
Only the controls that apply to the current style are shown. Oversampling, Linear phase, 4x on export, the ceiling mode, M/S, Sidechain, Stereo link and Dither are in Advanced. Double-click any knob to reset it.
| Control | What it does | Typical setting |
|---|---|---|
| Input | Turns the mix up or down before the limiter. With Auto makeup on, use Threshold for loudness instead. | 0 dB |
| Threshold | Where limiting starts. With Auto makeup on, lowering it makes the track louder. Learn sets it for you. The meter behind it shows the signal going in. | Set by Learn |
| Ceiling | The highest peak the output can reach. See Ceiling and codecs. | −1.0 dBTP |
| Attack | How quickly a peak is turned down. Faster catches more but can soften punch; slower lets transients through. | 1 to 10 ms |
| Release | How quickly the limiter lets go. Too fast can distort bass; too slow pumps. | 80 to 150 ms |
| Adaptive release | On dense passages, stretches the release up to 3x so it doesn't pump; on sparse ones it stays at the setting. | On |
| Lookahead | How far ahead the limiter sees. Your DAW compensates for the delay. | 5 to 10 ms |
| Clip (Punch Guard) | How much of each peak goes to the clipper instead of the limiter. More keeps more snap; too much starts to crunch. | 1 to 3 dB |
| Drive (Soft Clip) | How hard the signal is pushed into the clipper. | To taste |
| Crossover (Multiband) | Where the lows split from the highs. | about 150 Hz |
| Bass first | When a peak comes mostly from the low end, only the low band is turned down, so hats, vocals and snare don't duck with every kick. Lookahead and Brickwall. | On for kick- and 808-led music |
| Bass range / Bass freq | The most the low band may be turned down on its own, and where the low band ends. They appear once Bass first is on. | 6 dB · 100 to 150 Hz |
| M/S | Limits the centre and the sides separately, so wide parts don't pull the centre down. | Off |
| Sidechain | Lets another track routed to Liminal's sidechain input decide when to limit. Brickwall and Lookahead. | Off |
| Auto makeup | Turns the output up so the loudest peaks sit at the ceiling. Turn off to set the level with Output. | On |
| Output | Sets the output level by hand when Auto makeup is off. | 0 dB |
| Stereo link | How much left and right are turned down together. 100% keeps the image solid. | 100% |
| Oversampling | Runs Brickwall, Soft Clip and Punch Guard at 2x or 4x, so hard limiting and clipping stay clean. Costs CPU and a little latency. | 2x or 4x for Punch Guard |
| Linear phase | Keeps the timing of every frequency identical when oversampling, at the cost of more latency. | Off |
| 4x on export | When your DAW bounces offline, uses 4x oversampling for the cleanest result while playback stays lighter. | On for the final bounce |
| Dither | Hides the distortion of reducing word length. Only for the final bounce, and only if your DAW doesn't add its own: 24-bit for 24-bit files, 16-bit for 16-bit. | Off while mixing |
8. Listen
- Level match (above the display): your unprocessed mix at the same loudness as the output. Flip it on and off to judge what limiting does to the sound without louder fooling your ears.
- Hear what's removed (above the display): only what the limiter takes away. Ideally faint transient ticks; clicks, crunch or bass in here are what listeners lose.
- Codec check (Tools): the output through a real Opus encoder and decoder at 128 kbps (what YouTube streams), in real time. About 30 ms late, for listening only.
- Reference track (Tools): your reference track at your output's loudness, following the playhead. Load one in Optimise.
Only one can be on at a time, and pressing it again goes back to the normal output. They're for monitoring only: they aren't saved in presets and never change your bounce. Turn them off before you export.
9. Meters and readouts
| Readout | What it tells you |
|---|---|
| Integrated (LUFS) | The big number on the Loudness card: loudness of everything played since the last reset, the number streaming services use. Click the card (or More) for the rest of this table; Reset meters starts the readings again. |
| Distance to target | How far the integrated loudness is from your Learn target. |
| Short-term / Momentary | Loudness over the last 3 s and 0.4 s, with the loudest so far. |
| True peak out | The highest output peak since reset, including peaks between samples. |
| Codec peak | The highest peak a listener gets after lossy encoding. While listening through Opus it shows the real decoded peak. |
| PLR | True peak minus integrated loudness: the density. 8 to 12 dB is typical for punchy, competitive masters. |
| Punch | How far the hits stand out from the music around them. The small figure is how much the limiter takes off; under 2 dB is clean, over 4 dB the drums lose their snap. |
| LRA | Loudness range between quiet and loud sections. Pop and electronic music is often 4 to 8 LU. |
| GR | How much the limiter is turning down right now. Orange shows the low band on its own (Bass first or Multiband). |
| Correlation | +1 is mono, 0 is very wide, below 0 parts of the mix cancel on mono speakers. Above about +0.3 is safe. |
| Latency | The delay Liminal reports to your DAW, which compensates for it. |
Reset meters (bottom right) clears the loudness, peak and gain-reduction readings so you can measure from the top of the song again.
10. Views and Tools
Three tabs are always there:
- Limiter: the last 10 seconds going in, what's left after limiting and the gain reduction, with the threshold dashed.
- Loudness: short-term loudness over time against your target.
- History: gain reduction over a longer stretch. A line that never returns to zero means constant limiting.
The rest open from Tools and appear as a fourth tab:
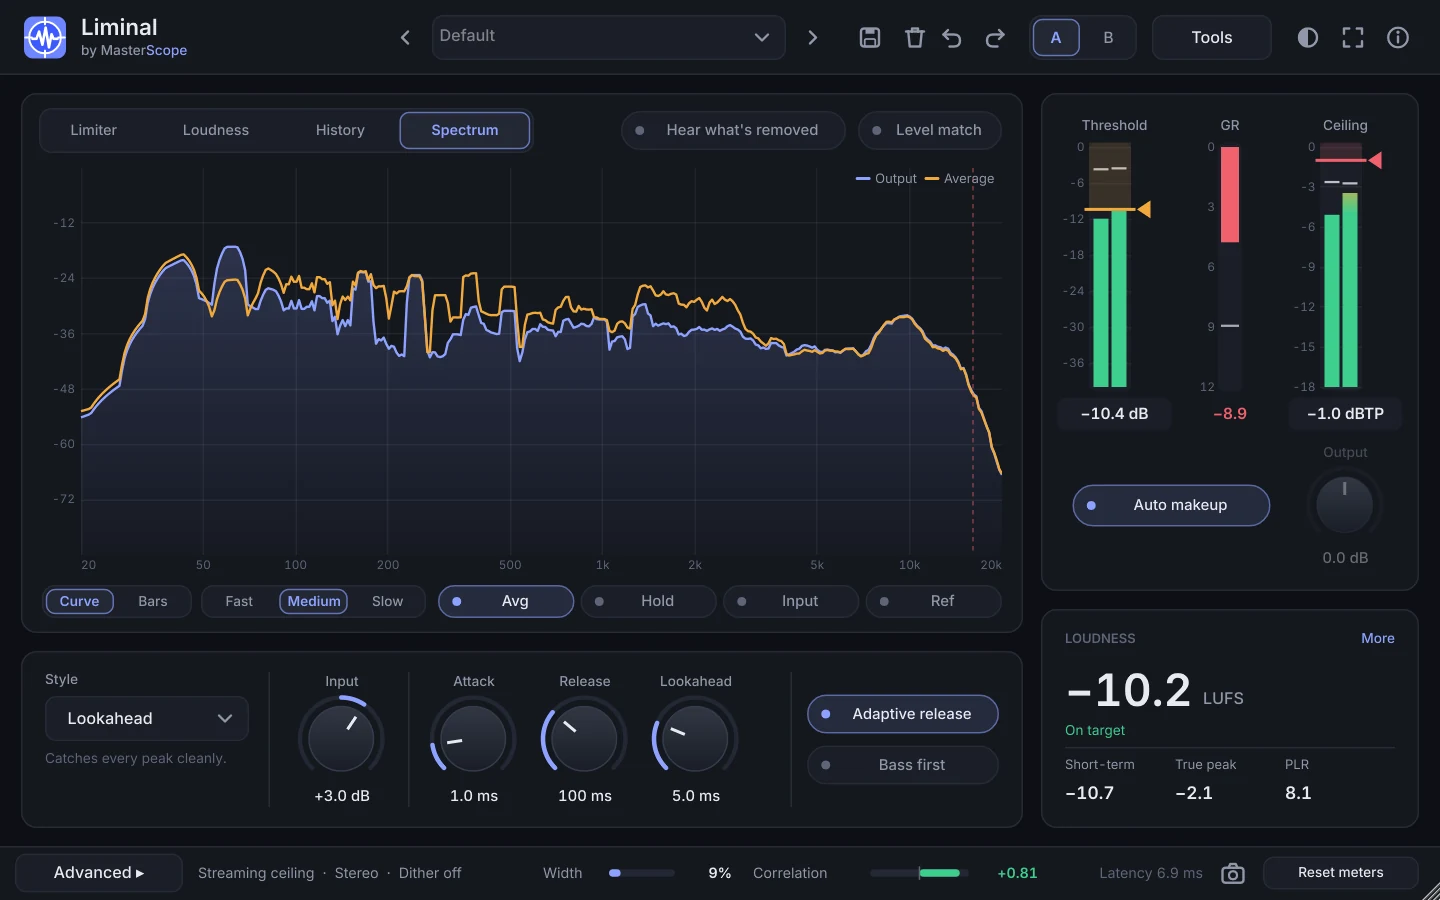
- Spectrum: the output's frequency balance, scaled so pink noise is flat, with Average, Peak hold, Input and Reference overlays. Hover for frequency, note and level; double-click to clear.
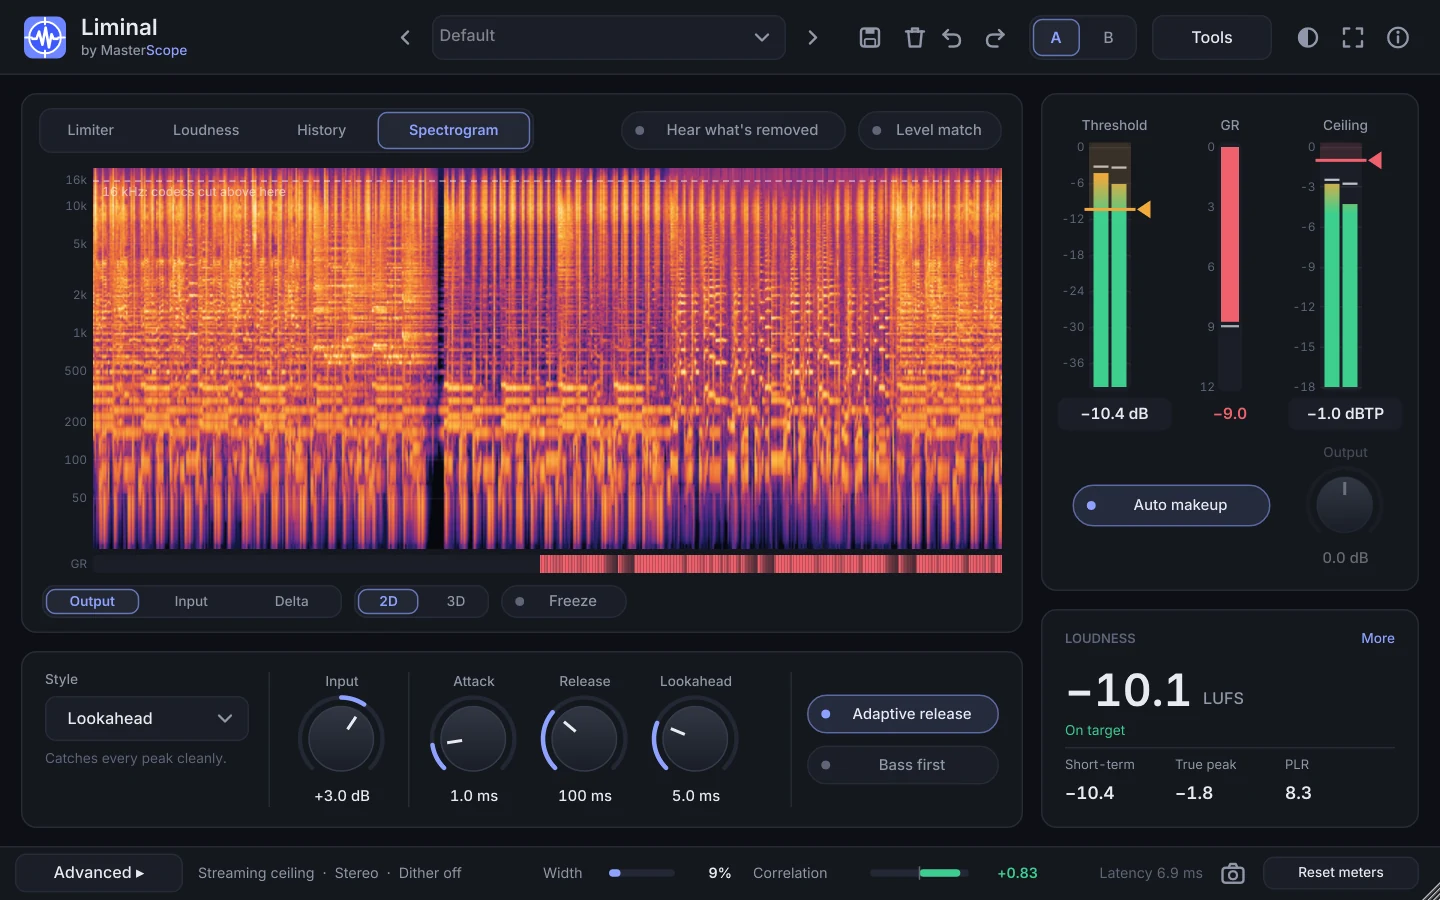
- Spectrogram: frequency over time in 2D or 3D, with a Delta view of only what limiting removes. Freeze holds the picture.
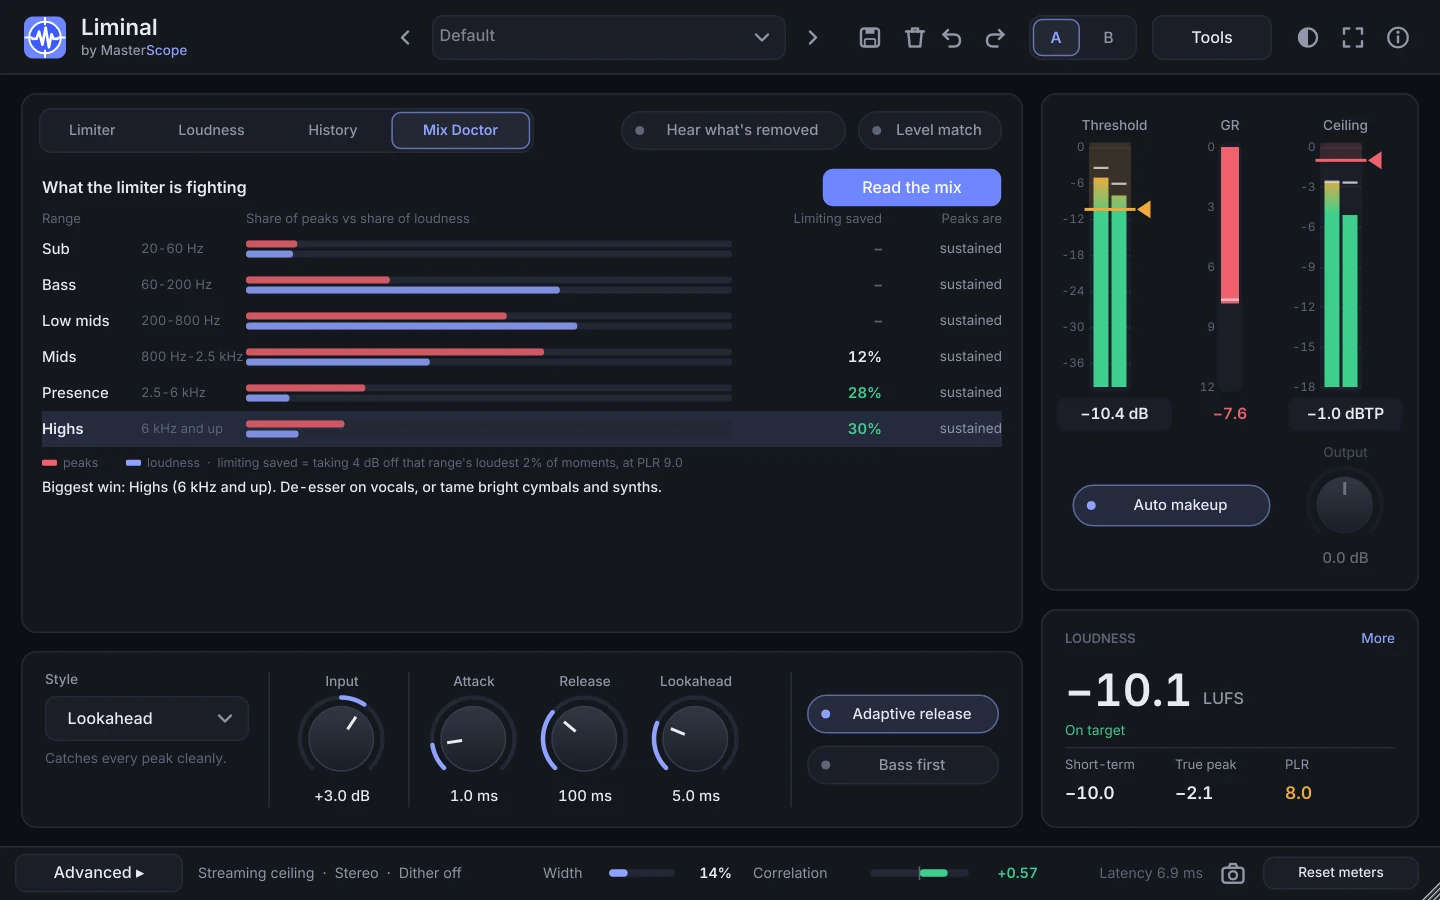
- Mix Doctor: after Learn, shows which part of the mix makes the peaks the limiter fights, how much a little peak control there would save, and what to change in the mix.
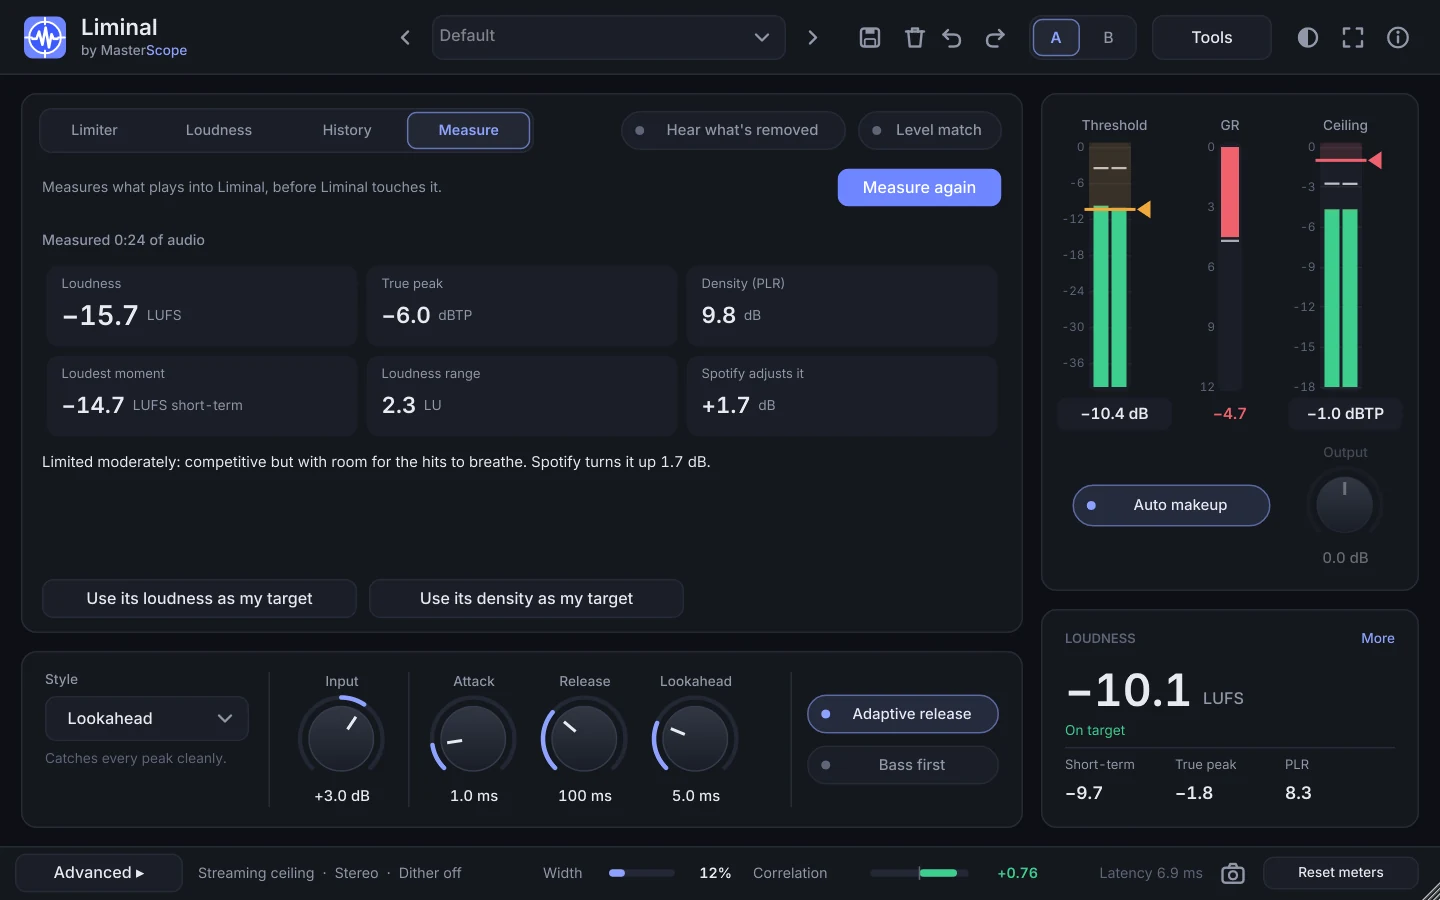
- Measure a song: measures what plays into Liminal before Liminal touches it, such as a reference track on another channel routed in: loudness, true peak, PLR, its loudest moment and loudness range, with buttons to use its loudness or density as Learn's target. For songs on Spotify or YouTube, use MasterScope Meter.
- Optimise: see the next section.
11. Optimise, reference and release pack
All three are in Optimise (Tools) and use the audio Learn heard, so run Learn first.
Optimise
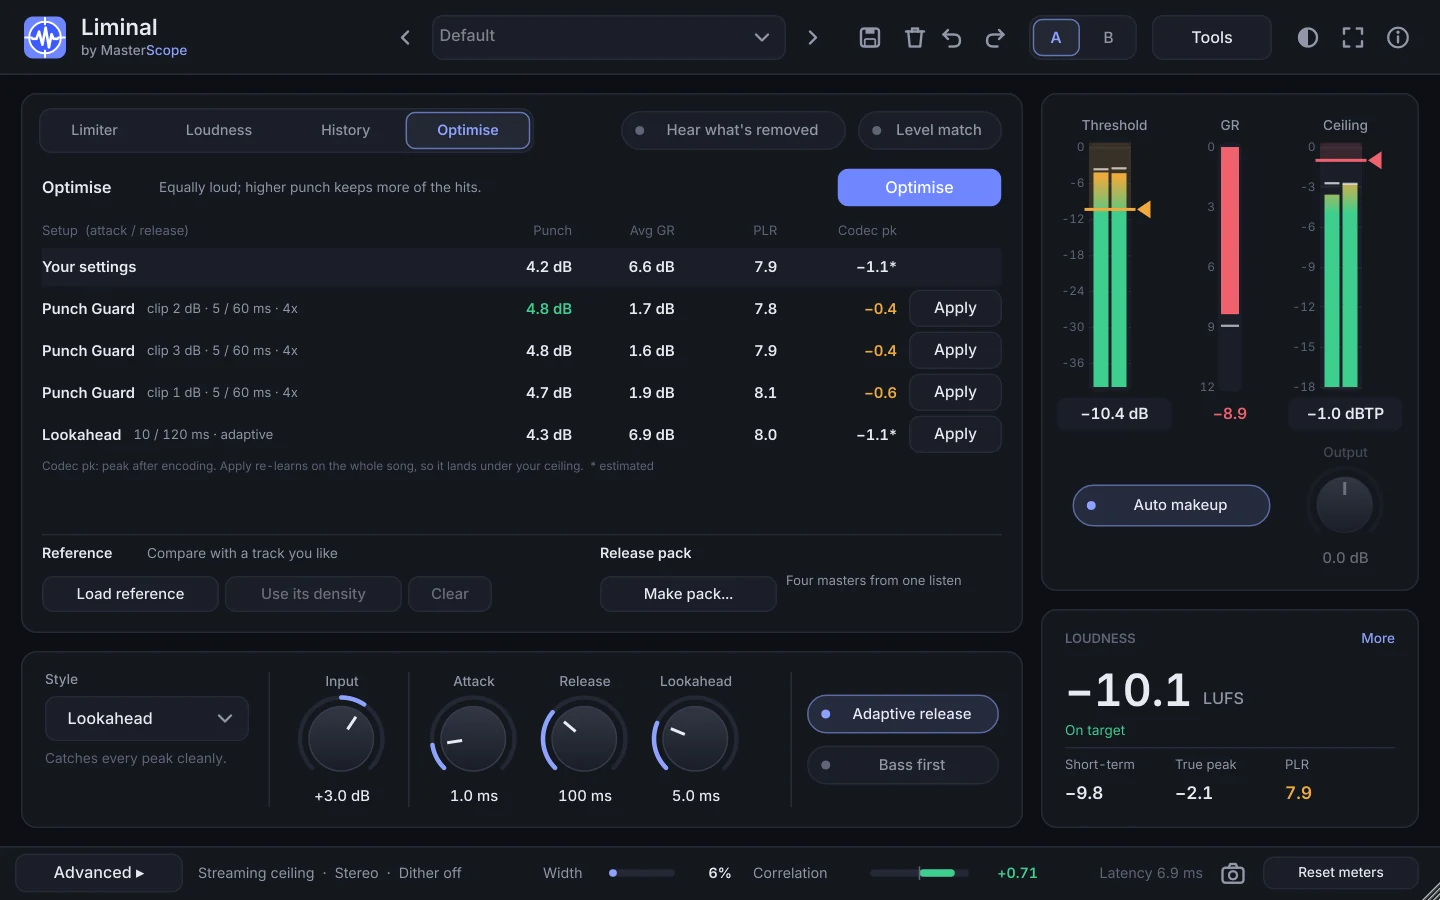
Tries about 30 setups (different attack and release, Multiband, Punch Guard, Bass first, Brickwall) on the loudest 30 seconds. Every one is learned to your target and ceiling mode, so they're all equally loud and dense, and they're ranked by punch. The top ones are checked with the real encoders. Press Apply to use one: Liminal sets the controls and re-learns it on the whole song. Undo goes back.
Reference track
Load reference takes a WAV, AIFF, FLAC or Ogg of a released track you like. Liminal measures its loudness, peaks, density, punch and tone. Reference track in Tools plays it at your loudness, the spectrum can overlay its tonal balance, and Use its density sets Learn to its PLR so your master is as dense as the reference.
Release pack
Make pack learns and writes four masters from one listen: Streaming −14 (safe on every codec), Club −9, Apple Music −16 and YouTube −14 (Opus-safe). Each is a 24-bit WAV with its MasterScope report. Choose a name and the files go next to it.
12. Presets, A/B and reports
- Presets: 14 factory presets, from Streaming: clean (PLR 11) to Broadcast −23 (EBU R128), plus your own. Save stores the current settings; Delete removes a preset of yours.
- Import preset (at the bottom of the preset menu) loads a preset file, such as the one MasterScope suggests from your report. It's copied into your presets and can be undone.
- A/B: two sets of settings to compare. Click the other letter to switch; changes stay in the slot you were on.
- Undo / Redo cover every change, including Learn and Apply.
- Session log (Tools): press, play the song, press again, then choose Open in MasterScope, or save it as .json (for MasterScope later) or .csv (for a spreadsheet). Learn's Report button gives you the same file without a second play-through.
- Learn, then press Report and choose Open in MasterScope. (Or save the .json file and drop it on MasterScope.)
- MasterScope opens in your browser with the platform-by-platform verdict, a timeline, and suggested changes to your Liminal settings.
- Download the suggested preset, use Import preset in Liminal, and Learn again.
13. Troubleshooting
- Liminal doesn't show up in my DAW.
- On Windows, check that
Liminal.vst3is inC:\Program Files\Common Files\VST3, that your DAW is 64-bit and has VST3 enabled, then rescan plug-ins. On a Mac, check/Library/Audio/Plug-Ins/VST3(VST3) or/Library/Audio/Plug-Ins/Components(Audio Unit). Logic and GarageBand only check new Audio Units when they start, so quit and reopen them; in Logic, Settings → Plug-in Manager shows whether Liminal passed its check. - Optimise, Mix Doctor or the release pack say to Learn first.
- Optimise, Mix Doctor, the release pack and Report all use the audio Learn heard. Open Tools, press Learn, play at least a few seconds (ideally the whole song), and press Stop.
- The loudness doesn't match my target.
- The readings only cover what has played since the last reset. Press Reset meters and play the whole song, or run Learn again if you changed something before the limiter.
- It sounds squashed.
- Try a higher PLR target (11 or 12), Punch Guard with 2x oversampling, or Optimise. Then check Mix Doctor: often one part of the mix makes most of the peaks.
- The kick makes everything duck.
- Turn on Bass first (Lookahead style), or try Multiband.
- Open in MasterScope opens the site but not the report.
- Liminal hands the report to the browser on this computer only. If the browser asks to let MasterScope reach apps on this device, choose Allow. If it still doesn't open (some browsers, such as Safari, block it), Liminal has already saved a copy in Documents › MasterScope: drop that file on MasterScope.
- High CPU or latency.
- In Advanced, lower Oversampling or turn off Linear phase while working, and turn on 4x on export so the bounce is still clean. Brickwall has no limiting latency at all, for tracking.
Still stuck, or found a bug? Tell us on the feedback page, or email masterscope@gwstudio.com.au.